Landscape photography using digital
SLR cameras
~ Photographing Reflections ~
by Steve Carter
Let me say
straight away that I don’t think of myself as a particularly good photographer.
Others seem to rate my work, but I only ever see the mistakes. Also, I get to
see the ninety nine I erase for the one I keep! However, over the years of
working with digital cameras, I have found a few techniques that I think are
worth sharing, hence this piece of writing.
As the
photos I will post in this article are ‘pasted’ into MS word, I have included a
hyperlink with each photo. Provided you are on-line as you read this, by
clicking on the image, a higher quality version will be
displayed in your internet browser
For your
information: I currently use a Nikon D2X and various lenses, and Photoshop for
post production. I am however about to upgrade the camera… again. (It’s a
bottomless pit).
There is a
lot of talk about using Photoshop (or other similar applications) being akin to
‘cheating’. Well it’s true that one can manipulate any image to make it look
anything one likes, but for me, a photo should look as much as it did to my eye
as I took it, so I make no apology for adding some contrast and possibly
sharpening a little (Digital cameras are prone to not producing enough of
either). In any case, back in the days of darkrooms I was cropping, dodging and
burning. These techniques I still use, but now on my PC.
I do not
use HDR ‘tone mapping’ programmes like Photomatix – which do create
stunning images – but to my eye they generally look unreal. What I try to do is
capture a moment and reproduce it as it was. If I find myself lucky enough to
see something like the scene below, I want to share it!
I see a lot
of photographers, who visit the area, stay in a B&B or hotel, have
breakfast and then pack their camera and tripod and go off to take some shots.
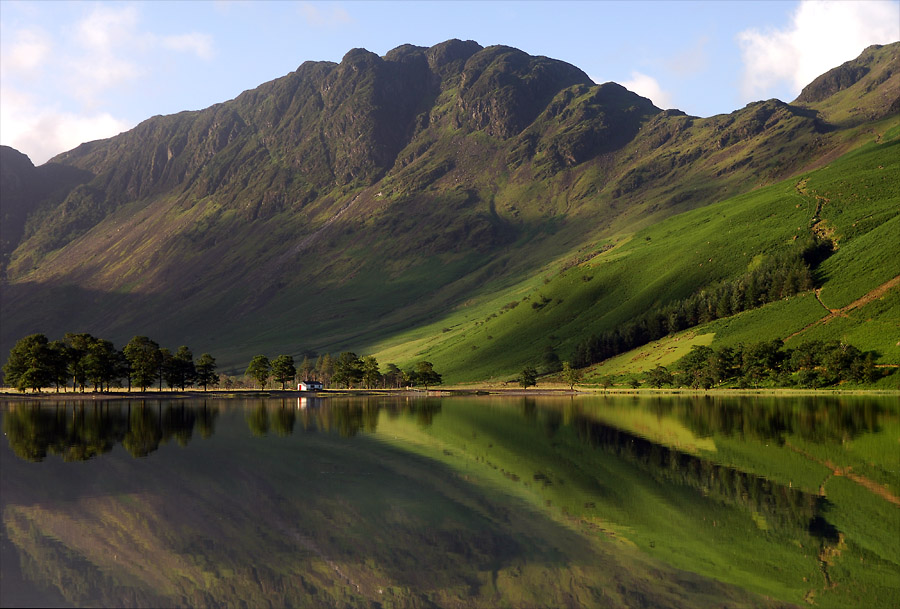
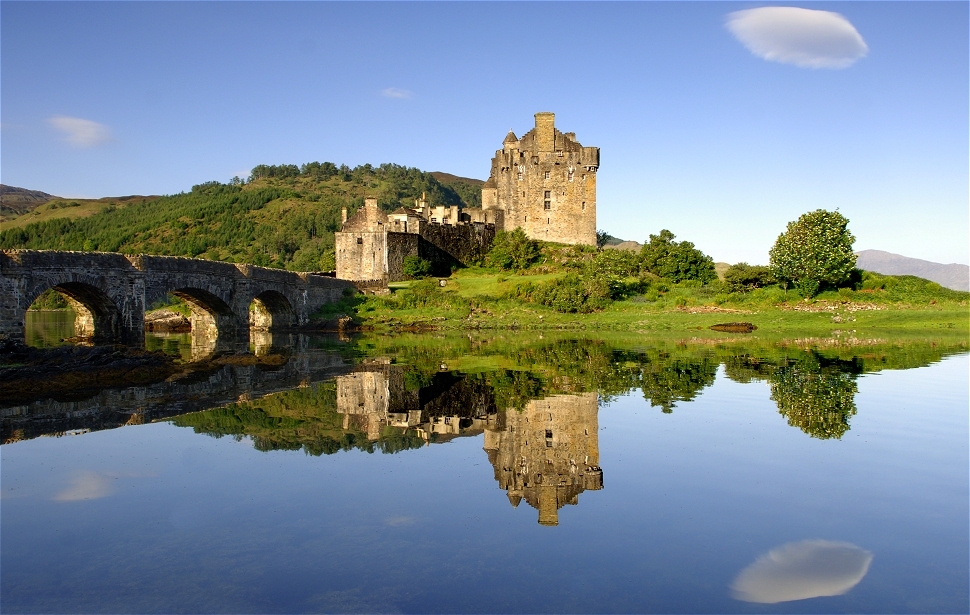
I think 90% of my images (excluding sunsets) are taken before these photographers
are awake. The image above was taken at about 05.30. There is often a magical
10 minutes on sunny mornings when the temperature of the air and water will
allow a perfect reflection. I often get up very early and find the spot to set
up and wait. Mostly I am disappointed, but just occasionally and for only a
very short while, I am rewarded. The photo below is remarkable in that it was
taken at about 11.00 – It’s rare to find totally still water that late in the
day.
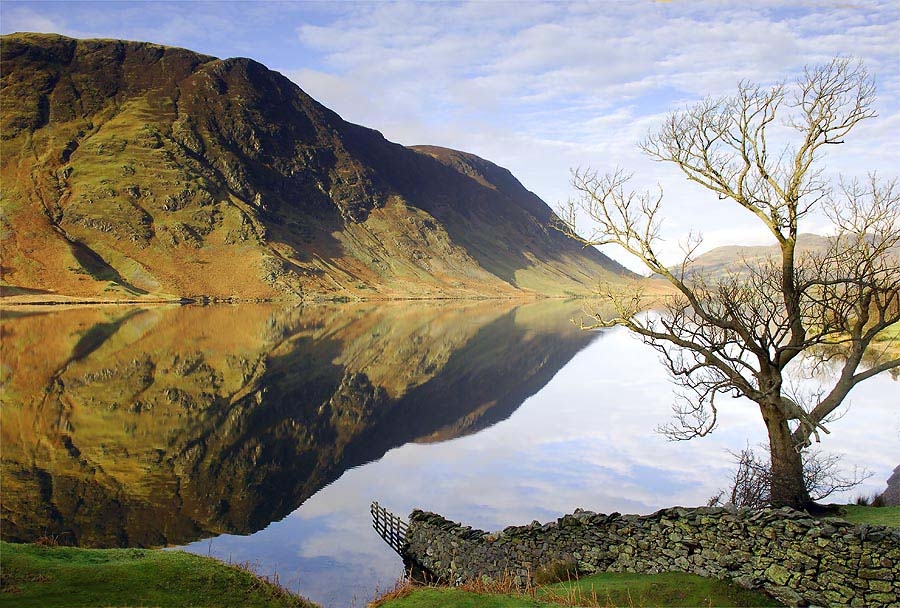
The images
above and below share a similarity (though it can be spotted more readily
below). I nearly always use a gradated neutral density (grey) filter when I am
photographing a landscape. Fitting to the front of a lens it darkens the sky
giving the camera a chance not to overexpose the sky or underexpose the land.
It also helps prevent ‘blowing’ the highlights in the clouds. Cokin sell a
fixing and filter for about £30. Lee produce the same for about three times as
much (but it is of much better quality)
There are
times when the land/foreground are going to be way too dark, so the sky will
undoubtedly overexpose. Just occasionally I will use a technique called ‘digital
blending’ to ‘fool’ the camera into taking what I can see (but it, being fairly
dumb - cannot). I take two photos, one exposed for the sky, the other for the
land. A tripod is essential to get exactly the same image. When I get home, I
‘cut and paste’ the correctly exposed sky over the correctly exposed land. Sounds
like a cheat? Not in my book. Below is an example of digital blending, and
that’s what it looked like to me. If I had trusted the camera to capture the
image correctly, I would have been seriously disappointed with the results.
Of course
this is essentially what HDR programmes do automatically (having damned them
earlier) – but almost inevitably people seem to ‘over-egg’ with HDR. Something
one cannot be tempted by when digital blending.
|
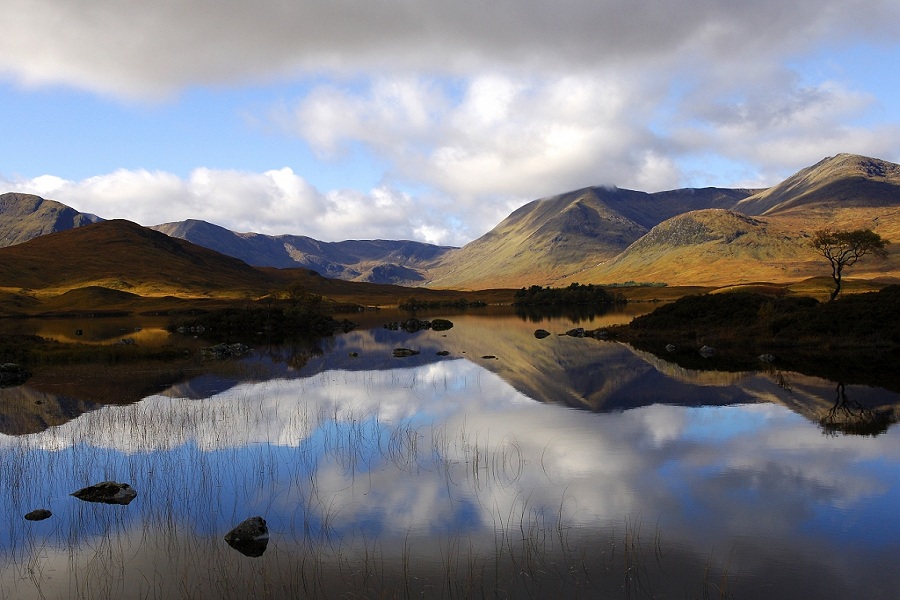
When
taking sunsets, I find having water between me and the sun more than doubles
the visual impact. I see lots of photographers posting their photos on the
internet, and often the sun or sky is indeed amazing, but the foreground
often consists of telegraph poles and housing estates. Again I
will almost always use one or even two ND filters to try and keep the sun
from ‘burning out’ And
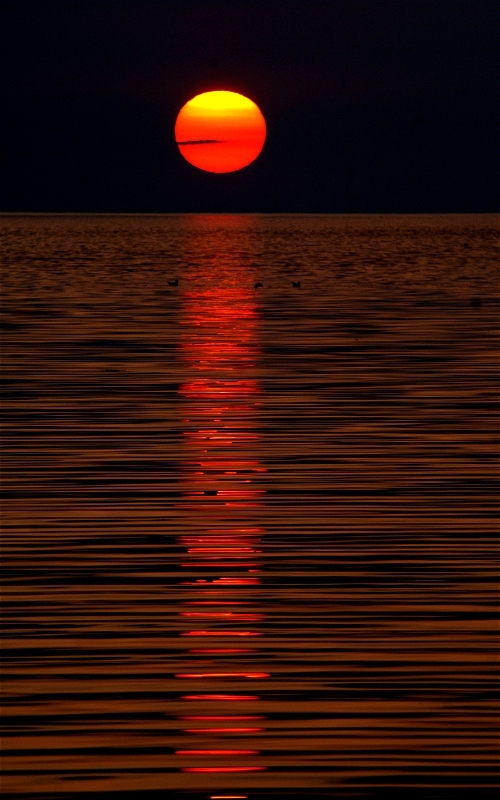
occasionally I will spot meter on the sun – as with the photo right – this
has the unusual effect of turning the sky black – but it is (I think) quite
striking. Whenever
I take sunsets I look for clouds. It may sound daft, but when sun, clouds and
water find themselves together in the right combination, the results can be
spectacular. |
|

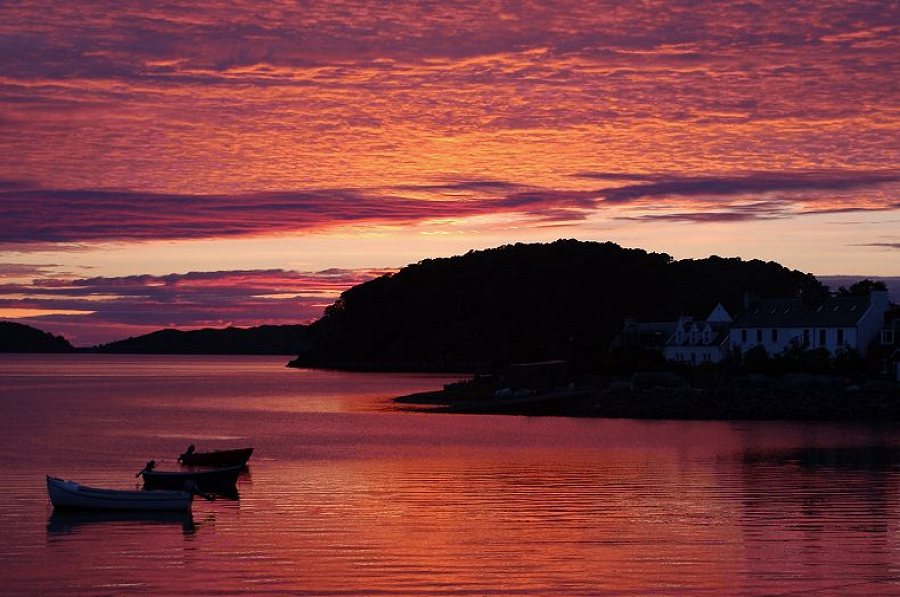
In both
shots (above and below) the sun being behind the clouds has created colour that
a camera can manage, and the reflections have given a 3D effect to the image, leading
ones eye in. The colours before and after sunset are obviously very different,
and below, one post production technique I used was to ‘select’ the white
houses and brighten, as the camera was having a real problem even knowing they
were there.
Probably
the most obvious point to mention here is that, at certain times of the year
when I go out in the evening to take a sunset, I wear a ‘full monty’ midge
jacket. I look stupid for the first 20 minutes, but from then on the flapping
arms of tourists look even more daft.
|
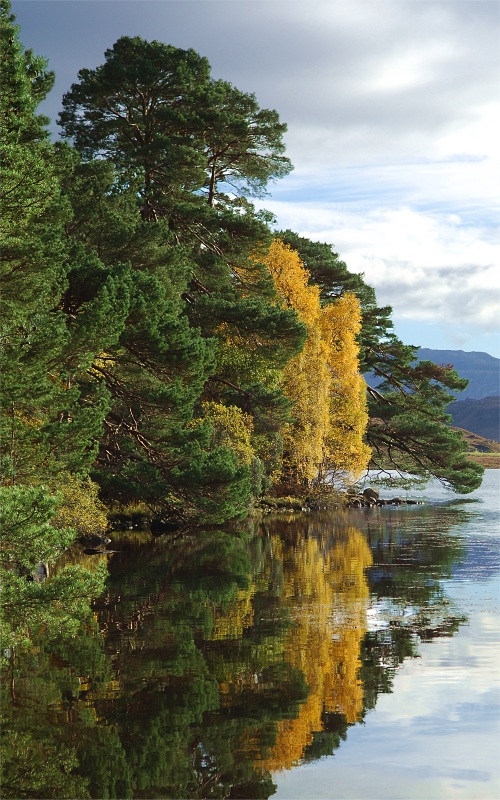
Trees
create great reflections, but we probably don’t realise how dark they are
compared to a bright sky. Digitally
blending the sky with the tree would be a bit of a nightmare, so in the shot
(right) I used 2 ND filters, one in front of the other at an angle to give
the camera its best chance of holding the highlights. It didn’t quite make
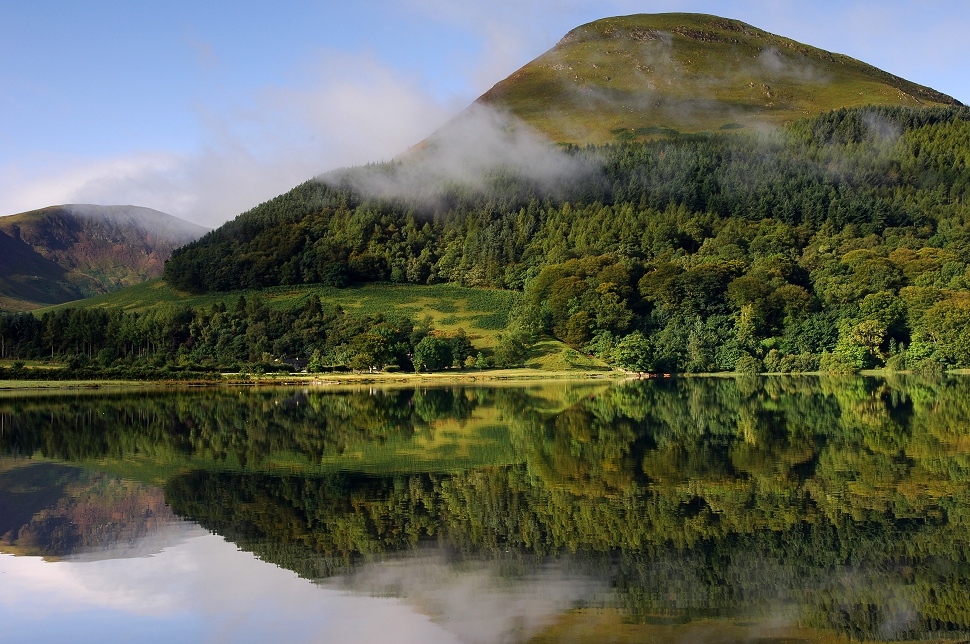
it, but I still like the shot. Again
(below) I angled the ND filter to keep the sky as dark as possible and to
stop the clouds from bleaching out. Another
very early morning shot by the way. |
|
|
|
|
|
|
|
I’ve tried
hard so far to avoid getting into ‘techie’ stuff (as it puts most people off)
but here in simple terms is how I usually approach landscapes with reflections
(and almost all landscapes). Others may well do it differently – this is what
‘I’ do.
If
possible use a tripod.
Use
either a prime (non zoom) or very good quality zoom lens. I generally use the
Nikkor 17-55 f2.8 ED – but as I’m about to change camera I will use the Nikkor
AFS 24-70 ED. Pro quality Nikon Lenses have the letters ‘ED’ in the very long
title and unfortunately using cheap DSLR cameras or cheap lenses will almost
always result in poor images.
If
needed, use a graduated ND filter to hold the highlights in the sky (most of
the time)
To get
the most reflection, don’t use a polarising filter
Set the
ISO of the camera to its lowest setting (100 is perfect but many DSLRs only go
down to 200)
Set the
camera to meter light from as much of the scene as possible. (Most DSLRs
default to this setting)
Set the
camera to Aperture Priority
Choose a
high aperture number (slow shutter speed). This will give lots of ‘depth of
field’ and make both foreground and background in focus.
Set the
camera to ‘bracket’ three shots, including one under exposed, the other over
exposed.
Wait
till the light is right. Don’t take a shot if it isn’t. Take three shots (belt
and braces bracketing!)
Look at
the histogram (again, most DSLRs have a histogram function). Histograms are a
whole subject in themselves, but they are a really good way of instantly
telling the photographer if the shot has been correctly exposed.
At home,
crop, add contrast and sharpen if needed, remove any dust marks if you have to
(I have to every time) …and then relax…
until next time.
More of my
photos can be seen here